How to create a custom Alpaca instruction dataset for fine-tuning LLMs

Table of contents
- Introduction
- 1. Understand the Alpaca Dataset format
- 2. Prepare Your Data
- 3. Create Your Dataset
- 4. Publish Your Dataset to Hugging Face
Introduction
In this tutorial, I explain how to create a custom Alpaca dataset for fine-tuning LLMs like Llama 3.1.
📖🧑💻 You can find the companion Jupyter Notebook for this tutorial here.
One of the most critical aspects of fine-tuning an LLM is preparing your dataset in the correct format.
1. Understand the Alpaca Dataset format
The Alpaca dataset is a commonly-used format for fine-tuning Llama 3.1 models.
It consists of three key components:
instruction: A prompt or question that guides the model's response.input: Additional context or information (can be empty).output: The desired response from the model.
[
  {
    "instruction": "Write a short story about a robot learning to cook.",
    "input": "",
    "output": "In a bustling kitchen of the future, Robot X-5 stood motionless, its optical sensors fixed on the sizzling pan before it. 'Crack two eggs,' the recipe instructed. With precision, X-5 selected an egg from the carton, but its metallic fingers crushed the delicate shell, sending yolk dripping down its chassis. Undeterred, X-5 tried again, this time adjusting its grip strength. Success! The egg cracked perfectly into the pan. As the day progressed, X-5 learned to chop vegetables without pulverizing them and to measure ingredients with increasing accuracy. By evening, a slightly lopsided but edible omelet sat on a plate, steam rising from its golden surface. X-5's LED display flickered in what could only be described as pride. It had taken its first step in mastering the art of cooking, proving that even robots can find joy in creating something delicious."
  },
  {
    "instruction": "Explain the concept of photosynthesis in simple terms.",
    "input": "",
    "output": "Photosynthesis is like a plant's way of making its own food. Imagine plants as tiny factories that use sunlight as their power source. They take in water from the soil through their roots and carbon dioxide from the air through tiny holes in their leaves. Then, using the energy from sunlight, they mix these ingredients together to make glucose, which is a type of sugar that plants use for food. As a bonus, this process also produces oxygen, which is released into the air for us and other animals to breathe. So, in simple terms, photosynthesis is how plants turn sunlight, water, and air into food and oxygen."
  },
  {
    "instruction": "Describe the steps to change a flat tire.",
    "input": "",
    "output": "1. Ensure your car is safely parked on a flat surface, away from traffic. Turn on your hazard lights.\n2. Locate your spare tire, jack, and lug wrench in your vehicle.\n3. Loosen the lug nuts on the flat tire slightly, but don't remove them completely yet.\n4. Place the jack under the designated lifting point of your car and raise the vehicle until the flat tire is off the ground.\n5. Remove the lug nuts completely and take off the flat tire.\n6. Place the spare tire onto the wheel hub.\n7. Replace the lug nuts and tighten them by hand.\n8. Lower the car back to the ground using the jack.\n9. Use the lug wrench to fully tighten the lug nuts in a star pattern for even pressure.\n10. Store the flat tire, jack, and lug wrench back in your vehicle.\n11. Check the spare tire's pressure and drive carefully, following any speed restrictions for your specific type of spare tire."
  }
]
Getting the dataset format right is crucial for several reasons:
- Compatibility: Many finetuning scripts and libraries, including torchtune, expect data in this specific format.
- Error Prevention: An incorrect format can cause your finetuning run to fail midway, wasting valuable time and computational resources.
- Model Performance: The format helps the model understand the structure of prompts and responses, leading to better finetuning results.
2. Prepare Your Data
For the purpose of demonstration, the companion Jupyter Notebook fetches and processes all my writing from my website, which is open-source.
I use MDX for my content. MDX is Markdown interspersed with JSX / JavaScript components.

Getting my whole site within a Jupyter Notebook is a single command:
!git clone https://github.com/zackproser/portfolio.git
Next, I needed to extract the content from the MDX files. To begin with, I'm going to use all the articles under src/app/blog.
To prepare my data, I implemented a series of functions to process my MDX files, which you can see in the companion notebook.
These functions handle the conversion of MDX to plain text, clean the text, and process all MDX files in a directory.
Here's how I implemented the Alpaca format for my project:
def create_alpaca_entry(content):
    """Create an Alpaca format entry for the given content."""
    metadata = extract_metadata(content)
    cleaned_content = clean_content(content)

    article_name = metadata.get('title', 'an article').strip('"')

    return {
        "instruction": f'Write an article about "{article_name}"',
        "input": "",
        "output": cleaned_content
    }
This function takes the content of an MDX file, extracts the metadata (including the title), cleans the content, and formats it into the Alpaca structure.
3. Create Your Dataset
After processing the MDX files, I created the final Alpaca-formatted dataset:
alpaca_data = [create_alpaca_entry(content) for content in mdx_content]

# Save Alpaca format data to a file
with open('training_data.jsonl', 'w', encoding='utf-8') as f:
    json.dump(alpaca_data, f, ensure_ascii=False, indent=2)

print(f"Processed {len(alpaca_data)} entries and saved to training_data.jsonl")
This step creates an Alpaca-formatted entry for each processed MDX file and saves the entire dataset to a JSONL (JSON Lines) file.
I run this Data preparation Jupyter Notebook on Google Colab, so the final training_data.jsonl file is written to /content/training_data.jsonl by default,
allowing me to download it.
In the end, my training_data.jsonl file is full of entries like this:
"input": "Write me an article about "Terminal velocity - how to get faster as a developer"", "output": ""You could be the greatest architect in the world, but that won't matter much if it takes you forever to type everything into your computer." Hugo Posca\nWhy read this article?\nWhen you're finished reading this article, you'll understand the why and how behind my custom development setup, which has subjectively made me much faster and happier in my day to day work.\n Here's a screenshot of my setup, captured from a streaming session..."
4. Publish Your Dataset to Hugging Face
With your training_data.jsonl file in hand, you're ready to publish your dataset to Hugging Face.
Depending on the environment you're working in, you could either export your Huggingface Token from Your Hugging Face tokens page, like so:
os.environ["HUGGINGFACE_TOKEN"] = "<your_token>"
Or, if you're working in Google Colab or Kaggle, you could create a secret named HF_TOKEN and then read it out of the environment like so:
from google.colab import userdata

os.environ["HUGGINGFACE_TOKEN"] = userdata.get("HF_TOKEN")
With your Hugging Face auth token set, you can log into Hugging Face and create a new dataset via the CLI:
# You shouldn't need to login if you exported your HF_TOKEN as above
huggingface-cli login

# Upload the dataset
huggingface-cli upload input_dir ./training_data.jsonl
You should see output like this:
Consider using `hf_transfer` for faster uploads. This solution comes with some limitations. See https://huggingface.co/docs/huggingface_hub/hf_transfer for more details.
https://huggingface.co/datasets/zackproser/wakka-test/blob/main/training_data.json
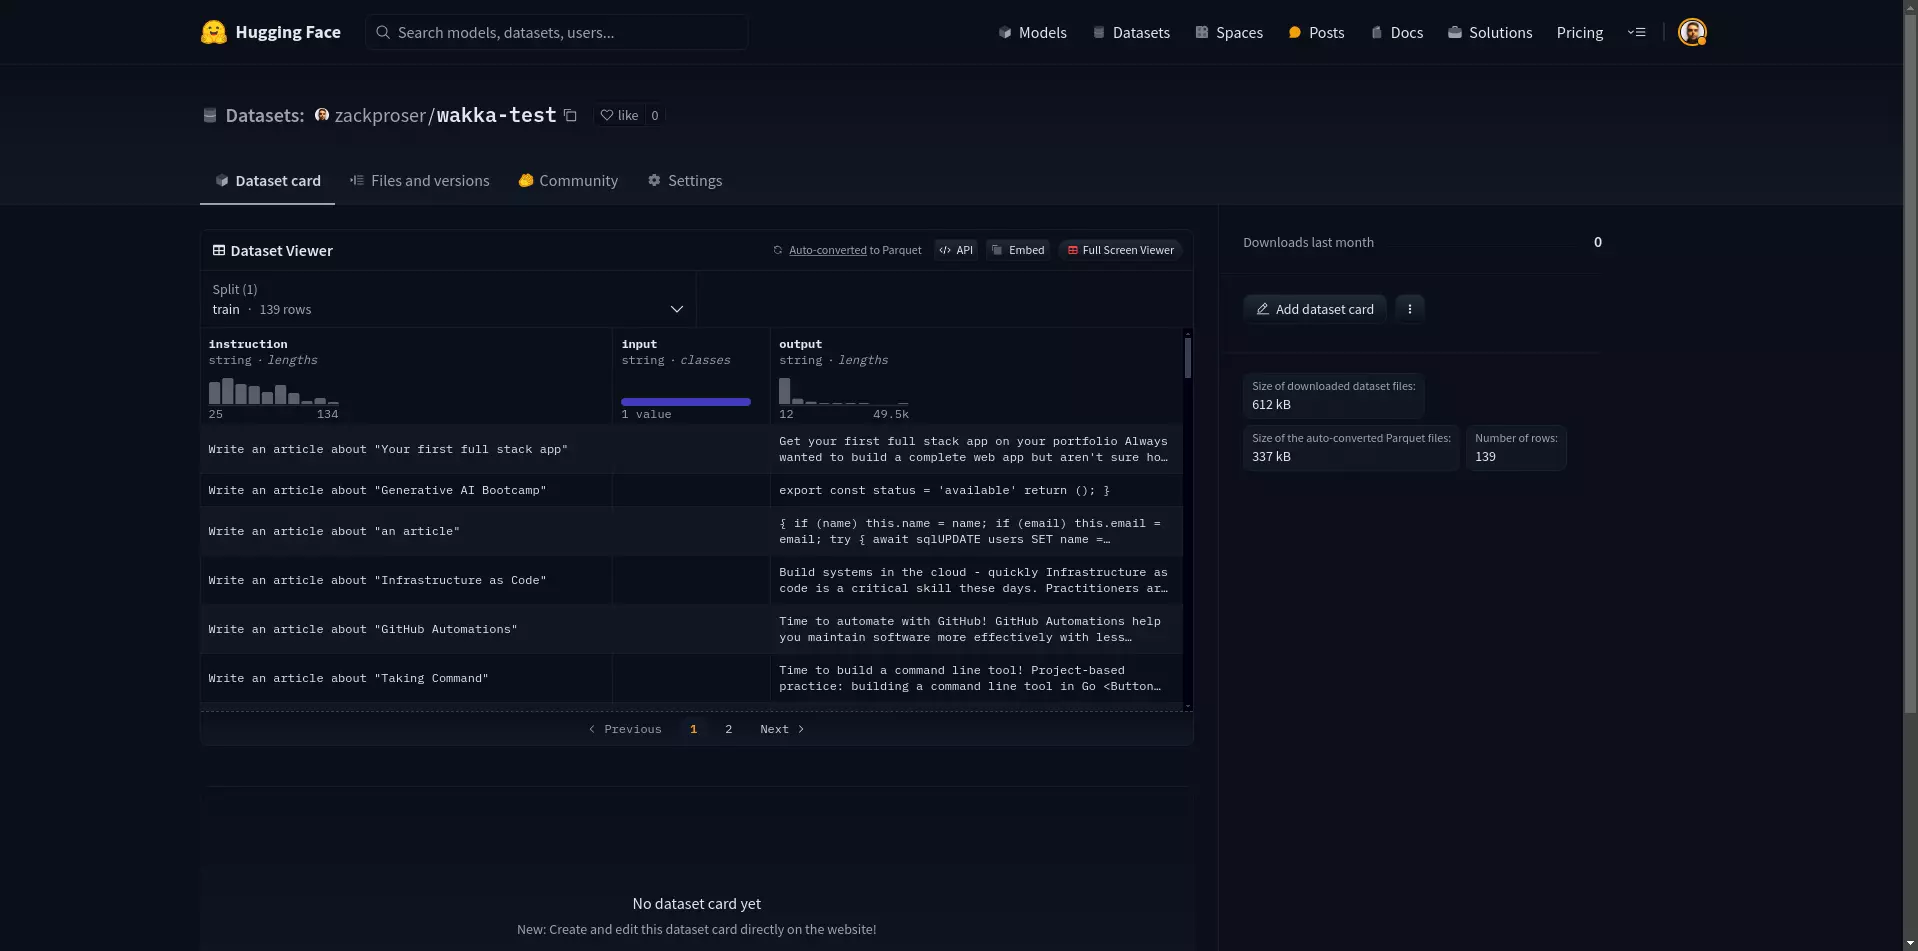
If all went well, you should be able to see your dataset on Hugging Face at the URL in the output.
